KEJOYCE.COM
follow me
  • Home
  • Research
  • Education
  • AWARDS
  • Blog
  • Gallery
  • Contact

A week in NZ to collect my new baby, Dino

9/12/2015

3 Comments

 
I spent last week in New Zealand with Aeronavics as the builder of my new UAS. It's been a tough project officially only running this year, but in reality it's been part of my world in some way for the past fifteen! To see it come to fruition has been pretty special.

I first contacted Aeronavics around two years ago. As a fledgling company they were doing some really cool things with drones. I always enjoyed talking to Linda (company director) as she was enthusiastic, knowledgeable, and focused on providing the right solution for me - not just in giving a hard sell. At the time I had minimal funding but she never made me feel like I was wasting her time. 

When I secured an Australian Research Council grant in November last year, I was able to think seriously about building the craft I had been considering for years. I was excited when Aeronavics won the tender to work with me on it. I knew that they had the right customer service focus to make this truly amazing.

Aeronavics operate out of a farmhouse in Raglan, New Zealand. Their set up is unique and adds to the feeling of being welcomed into their family, in their home. But this is not just a backyard operation. It is an incredibly professional setup with at least a dozen staff busily working - several of whom were solely focussed on delivering us perfection.

The week in Raglan was not without incident. This is a highly customised machine, and there were so many tweaks required. I didn't realise the level to which they were designing every little aspect just for me! On Thursday it seemed that nothing was going to go our way. One small modification meant cascading effects elsewhere. We had some battery problems that resulted in a minor crash, snapping the landing gear. The craft was dropping altitude in forward motion and seemingly having troubles with the barometer. The enclosed computers were over heating. I began to wonder if I'd be bringing it home. But in all honesty, I was pleased to see the problems arising over there, rather than when I took ownership of it! 

Yet the staff made it clear that they would not rest until they had engineered a solution for every problem. They worked until midnight and were back again in the early hours. Impressively, senior staff stayed behind to support the engineers and technicians, even if only moral support was possible. The directors brought dinners in. The colleague I brought with me pitched in where he could. I felt useless, but stayed anyway - it just wouldn't have felt right to leave! There were no complaints, no grumbles, just plenty of good humour.

On Friday morning somehow it all managed to come together. The pixhawk was swapped and the altitude drop ceased. They installed new lights and they looked awesome. It flew beautifully. It was still without a hard hat, as the large 'brain size' with all the computing power for my sensors meant they need to get a custom top 3d printed. But in the meantime, Dominique the local wedding dress designer created and fitted a soft cap. One of her more unusual assignments!

After our final test flights confirmed everything in working order, it was all hands on deck to pack it down, get our paperwork finalised, and get us out the door in time for our flight. What had been a busy but relatively relaxed week became suddenly stressful! We made it in the end on time and without excess baggage charges, which felt like a major achievement!

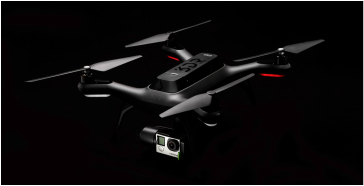
Before I left for NZ, I had naively thought the week would be straightforward and simple. What I had forgotten - and not for the first time in this project - was that pushing boundaries and ease are mutually exclusive.  I wanted a machine capable of carrying a unique payload of complex sensors. If I wanted simplicity, I should have gone to Harvey Norman and bought a Solo with Go Pro.

Having said that, Aeronavics largely took the pain out of the hard work. It has been a pleasure to worth with them and I appreciate the efforts of the team even more after I was immersed in it for the week. It's been fun, but now the hard work for me really starts in integrating my sensors and turning data into information. Oh, and in retrieving the UAS from customs in Brisbane after they seized it on my way back into the country...
3 Comments

Tips and tricks for the 3DR Iris+ with Tarot Gimbal & GoPro

8/11/2015

0 Comments

 
PictureIf the camera had been doing as it was told (i.e. pointing down), I wouldn't have this amazing shot
Last week I spent an entire day trying to sort out my Iris+ with Tarot gimbal / Go Pro setup. Yes, it's supposed to be plug and play. And it sort of was. Just not play properly. The issue I had was widely noted on the net: the camera / gimbal 'shuddered' and would not hold a position. Generally I could get it pointed straight down, or straight out, but nothing in between. And then in flight, it would randomly switch between down or out angle - perhaps it thought it could choose the camera angle better than I could! Indeed, there were some nice horizon shots!

​
​So back in the lab, I went back to the beginning to install and configure the gimbal. The reason I wasted so much time was because some of the websites that I visited had incorrect advice. Imagine that!

Rather than write an entire user guide, I've collated what I found out to work for me:

How to install the Tarot gimbal:
This is the best site to use. There are several, many with incorrect advice (including the 3dr official site!).

Make sure that you get the gimbal connection right! The connection shown here in step 3 is INCORRECT. The black wire needs to go to the pin on the bottom right of the picture, not the middle one. Thanks 3DR, this was one of my biggest problems - in this configuration the gimbal would not respond to the RC after the firmware upgrade at all. Weird that it responded beforehand though...

If the gimbal shudders (mine did!), upgrade the gimbal firmware as per above best site. Note the importance of NOT connecting to the power source until AFTER you start the upgrade. Weird hey. It's shown perfectly in the video below.

When trying to configure the gimbal, if you get a prolific USB to serial error, follow the directions on this page. I tried links from other pages as well but they didn't work. This was definitely the best one.

Once you've done all this, if the camera is not pointing in the correct direction, you need to re-calibrate it. Point it straight upwards towards the belly of the platform. Click on 'calibrate sensor'. This is shown in the video below as well.

If I had used the ardupilot wiki in the first place, then I would have saved myself a lot of time! For those sifting through the sea of advice on this matter, hopefully this confirms for you which recommendations to follow.

0 Comments

The Pleasure of the 3DR Solo UAV

7/11/2015

0 Comments

 
PicturePhoto credit: 3D Robotics
This morning I headed out to do a test flight with the 3DR Solo. I have to say - I was suitably impressed!

We flew with a GoPro in fixed position, rather than using a gimbal, so I can't comment about gimbal stability. But I liked the way the camera could be easily moved from looking outwards to downwards (pre-flight), while still feeling like it would hold its position during flight.

Some of the features that I particularly liked were:
  • The box it comes in! Nice and sturdy, one of those ones that you don't want to throw out. Which is great, because it will do the job for transportation until you figure out which Pelican case or similar you need in the longer term
  • The batteries. OK, propriety is a bit of a pain, and they are rather expensive, but their charge is easy to check with some lights on top, and they click in so smoothly to the upper body of the platform
  • The centre-default throttle, which is great for holding altitude
  • The integrated tablet holder, so you can use the Tower app at the same time as flying (annoying the app is not for iOS though)
  • Flat propeller profile - makes them easy to pack away
  • As with the Iris+, the idiot proof set up with the propellers having matching colours and icons to show which way to turn them to tighten - even my 4 year old can set this up without instruction
  • The information screen is really easy to read and informative! Even with polarising sunnies on, it was super clear to see
  • The option to add different payloads is a huge plus. We're looking to integrate a spectrometer, so I'm definitely keen to put this to the test
  • Changing between manual and automatic flight is very easy with the Tower app. I definitely recommend two operators though. 'Unmanned' airborne vehicle is a bit of a misnomer!

There are only a couple of minor things where there is room for improvement in my opinion:
  • Would like to see the front and back of the platform in different colours like the Iris+. The lights can't be seen during the day, so it's impossible to tell which way it's facing. Having said that, coloured or not, it's nearly impossible after it gets a little further away anyway, so I guess this isn't big issue.
  • I felt a little limited with the flight modes. I'm used to being able to flick a switch to change between loiter and alt hold, then RTL for example. That could be done from the tablet but I don't want to take my eyes off the aircraft and controller to switch. Might just take some more experimenting.

With the fixed Go Pro, I flew for approximately 16 mins on a single battery, landing at the recommended 20% charge. There was a light breeze and I wasn't really working it hard, so I expect that this is the upper limit of flight time.

Two years ago I bought a dJI s800 for a complete package of around $10K. It came in a dodgy half broken cardboard box with no balance charger or power supply. Yet it was considered 'ready to fly'. The batteries allowed for five minutes of flight time before four hours of charging. Flight planning was difficult, and it was near impossible to extract the telemetry details post flight. The technology has come a long way since then!

The 3DR Solo is certainly 'off the shelf' technology that can be purchased from Harvey Norman or similar. It set my colleague back about $2K for the platform, spare battery, android tablet, and Go Pro. Certainly a worthwhile investment for extending field survey range, and scaling up to satellite data.

There are a heap of other features that I didn't check out in this preliminary test. But it certainly exceeded expectations in the areas I considered. They have clearly done a lot of work in making the design as polished as possible, and it has paid off with user experience. This really can be used by a complete novice. CASA has an interesting challenge ahead to deal with regulation against increasing accessibility of these devices.


0 Comments

Tactical vs. Technical Teaching

6/10/2015

1 Comment

 
PictureStudents become 'aerial photographers' to learn about the challenges of image capture and distortions
My husband is heavily involved in the sporting industry. While he works across a range of different areas, one of the things that he especially enjoys is mentoring coaches. He was telling me recently about the difference between an athlete learning technical vs. tactical skills on the sports field, and I realised that the importance of this is no different for students in my classroom.

Describing the difference between tactical and technical is easy using a sporting analogy. As a kid, I learnt judo. I suppose that I was technically rather good - I rapidly progressed to the capped level of brown belt (under 11's) and I still remember having to perform 16 throws and five hold-downs to achieve this. But put me on the dojo for a competition and I didn't win a single fight. Why? Because I hadn't been taught tactically about how to deal with different situations and different opponents. I had no ability to translate my technique into fight winning tactics.

The relevance for tertiary education? How often do we ask students to regurgitate information in the same way that I rote learned my 16 throws? Will that arm them with the skills to perform in the workplace? In my analogy example - not necessarily. That's not to say that there is no place for technical learning. I certainly needed to learn the variety of throws, but what I missed was a deep understanding of how they could be applied. This would have made me more adaptable to any situation that was presented.

As the penny dropped on this particular example for me, it reminded me just how important it is to teach using problem based learning (tactical) approaches. In my classes, I tend to offer the technical learning as 'flipped' tasks, while my in-class activities are designed to foster more tactical learning (see 'My recipe to flip, not flop' and 'How to make sure your class isn't a flipping hell'). By presenting students with a range of different scenarios, I hope that I am helping to develop their skills and confidence in tactical problem solving. Hopefully they will be ready to face the reality of the workplace - or the 'fight'.

1 Comment

Love teamwork. Not a fan of group work... What's the difference?

3/8/2015

1 Comment

 
I love teamwork, especially sports. But to be honest, whenever I’m at a workshop and the facilitator asks the participants to get in a group, my inner self groans. Yet I don’t let this stop me from setting group tasks for my students! Why? Because I know that we learn better in social situations. And I know that the strong students will learn more from explaining things to the weaker students. And I know that the output of the whole should be greater than the sum of the parts. But clearly these things aren’t enough to create the enjoyable learning experience that’s intended.

So I know why it's good to work in a group, and these same benefits apply to teams. But what’s the difference?

While out cycling the other day (when I do my best thinking) I had a bit of a light bulb moment. It comes down to the cliché – there’s no I in team. Ok, so it may appear there’s not one in group either, but I’d like to propose that it’s an insidious invisible I.

A team has a common purpose or cause that they all buy into, and this creates cohesion. Team members join together to reach a goal that they chose. Conversely, I think that a group is still just a bunch of individuals. A group may have one or more of the following critical differences:

-          Purpose or goal is not identified;
-          Members didn’t choose the purpose or goal;
-          Members don’t believe in the purpose or goal

The other thing that I think benefits teamwork is the appeal to competitive natures. When we are competitive, we are striving to achieve our best. When we are at our best, naturally it’s more enjoyable.

But what’s the ‘so what factor’ for me? I want to optimise the level of learning and enjoyment that my students or workshop participants experience. Subconsciously I think that I incorporate many of the good aspects of ‘team’ in the activities I set. But I can certainly do more. And I'm going to remember these points and test out my theory next time I create a team activity.
1 Comment

RPAS training - $5K. Manufacturer’s training - $1.5K. Operator’s Certification $10K. Amazingly high detailed imagery when and where you want it…. Priceless

28/7/2015

0 Comments

 
Over the past two days, I attended a workshop on UAS and remote sensing. It was sponsored by TERN / Auscover and was a great opportunity to share experiences with other researchers interested and active in the discipline. In many respects I consider myself a pre-schooler in this field and I wasn’t sure that I had a lot to contribute, but I was certainly willing to learn!

One of our activities was to discuss the current regulatory environment. In Australia, this is controlled by the Civil Aviation Safety Authority (CASA) and can be challenging to navigate. It was comforting to know that I am not the only one grappling with working my way through the system. Given the complexity of it, I thought that it might be useful to cover some of that here for any new players.

In all fairness, CASA is dealing with a rapidly changing technology and is doing its best to keep up. But with legislation that is more than ten years old, the current state of UAS is well beyond it. We are anticipating some changes in the near future, but until these are released, we must work within the bounds of the current rules.

Here’s what we know:

1.       All remote pilots must abide by the following (unless exemptions are given – though these take time and money to request):
a.       No flight within 3NM of an airport or helipad
b.      No flight within controlled airspace
c.       Maximum altitude of 400 ft above ground
d.      Minimum distance of 30 m from people and property
e.      Maintain unaided (i.e. no binoculars) visual line of site of the craft
f.        Have a minimum of 5 km visibility (this is enough to stop people operating in bushfires, there is no need for a separate ruling here)
g.       Daytime flight only
h.      No flight if the clouds are lower than 1000 ft

Many people knowingly or otherwise violate these regulations and can certainly be fined by CASA for doing so.

2.       If you are flying for any reason other than sport or recreation, the following also apply:

a.       Individuals must complete RPAS training including a radio operator’s licence (AROC), English proficiency, theory and practical testing, and five hours logged flight. This covers flight for platforms with a maximum take of weight (MTOW) <7 kg. Estimated total cost $5,000 per person, five days training
b.      Additional manufacturer’s training per person, potentially including ‘heavy lift’ for >7kg platforms. Estimated total cost $250 - $2,000 per person, half day to multiday training
c.       Operator’s Certificate – This is required for the Organisation, but is given to named individuals as the Chief Controller and Maintenance Controller. Note that this is a challenge if staff turnover is high, as a new OC will need to be sought if these positions change. Compile and submit organisational documents and procedures to CASA, 3 hr practical exam and 2 hr oral exam. Follow up audits at 9 months and 3 years. Estimated total cost $10,000

Note that the costs given above do not include staff time, so the investment is significantly greater than this. There are some other interesting points to consider as well if heading down this route:

1.       CASA certification process may take up to 1.5 years given the current waiting times
2.       The OC is given for a specified platform only. So if you add to your ‘fleet’, you need to re-apply to CASA to have your new platforms listed and tested.
3.       With more than one platform, the regulations state that you must employ a full time Chief Controller – i.e. this is the only job that they do. You can apply for an exemption to this though if only flying small (<150kg) platforms. This restriction would otherwise be prohibitive for small business for example.

Finally, aside from formal regulations, there are other items to include in your reality check when considering whether or not UAS applications are for you:
1.       Must invest time and money into continual training and flight practice for your pilots
2.       Preferably find an easily accessible location to fly and train without having to go miles away
3.       Not everyone can be a pilot even if they have been trained – some people just aren’t cut out for it, therefore you may lose on some of your investment
4.       Need to keep a redundancy in people, platforms, and sensors to ensure your business can keep running
5.       Have to ensure all maintenance and flight logs are appropriately documented (prepare to be audited)
6.       Purchase Ozrunways mobile app for aeronautical charts and radio frequencies

We estimate the overall start-up cost at around $200K-$250K to be operational, including staff time and training, certification, base platforms. The long term benefits hard to quantify, but in some cases this is the only technology that will provide the answers you need.

By comparison, around $2K per day + a mobilisation fee might get a commercial company to do the job for you… But most likely that would only be with a standard RGB camera. If you want to use thermal, hyperspectral, or LiDAR it would be another story. If you’re interested in hyperspectral sensors, have a look at my blog about the current options.

I wrote this not to deter new comers from entering the field, but to provide a realistic point of view so that it’s possible to make an educated decision about the real costs involved. It's not all sunshine and puppies! And I haven't really touched on the steep learning curve associated with flying and developing workflows for data analysis. It really needs to be someone's baby that they are fully dedicated to making work!

I wonder how this process is going to change over the coming years? Surely it's got to become cheaper and easier.

Thanks to all of the other workshop participants for the discussions that formed the basis of this blog.
0 Comments

Hyperspectral Sensors for UAS

14/5/2015

3 Comments

 
I'm currently evaluating a range of hyperspectral sensors, intent on flying one from a small UAV. Surprisingly, I have a few to choose from and more are coming into the market. I thought that it would be most useful to compile a table of sensor specs to make it easy to compare and contrast my options. Some of the characteristics of the sensors below are deal breakers for me, but they might still work for your application. So I'm not providing any recommendations here, just a compilation. Hopefully it will save you some time doing the same! Please let me know if I have made any errors.
Picture
I'll be presenting this tomorrow at the International Symposium for Remote Sensing of the Environment in Berlin. It's part of my story to demonstrate that building a UAS capability is not exactly straightforward! I'm really looking forward to presenting as I have the objective not only to share the knowledge that I have gained in this process, but also to seek the expertise of others. 

I'm hoping to be able to initiate a discussion around the collective trials and tribulations of those working with this technology. Here's hoping the audience is willing to step out of their traditional role of 'information absorbers' to actively participate in what I have planned. I've opened a back channel on Today's Meet to facilitate the discussion. I've used this technique with varying degrees of success in my classes, but this is a first for me to experiment with it in a more formal situation. I have no idea if the conference goers will want to play, but I'm certainly curious to see how it goes down! Just another way that my research is benefitting from my teaching.
3 Comments

High Intensity Interval Training Meets Remote Sensing Tertiary Education

3/5/2015

0 Comments

 
Picture
In my parallel life, I am a group fitness instructor. I teach high intensity interval training (HIIT) and I LOVE it. I love both the activity itself, but also the style in which I teach it. Short, sharp, and with lots of hard work and energy. I can't wait to get to the gym to teach, and I am buzzed afterwards.

At some point not so long ago, I wondered why I was a little less enthused for teaching my university classes. And that's when I realised that the traditional lecture is the equivalent of a long, slow, jog. Booooring. There are certainly some educational benefits if the students are able to maintain concentration, but they are just as likely to get caught napping and fall off the back end of the treadmill. As this penny dropped, I realised that my university classes could never be the same again.

Somehow, I needed to get aspects of the HIIT concept my lecturing. HIIT is supposed to be the fastest, most efficient way to get fit. Could the same be true for learning technical content? 

So I turned to my gym choregraphy notes. I looked at the workout sequence and changed my lecture plans to follow a similar structure. I created interval based learning activities - one problem based activity for each key learning objective. My flipped classroom structure also helped here.

My 'lecture' class now starts with a warm up – a simple, confidence building activity. As the class progresses, the activities get harder and more intense. They are fast and furious. Moving. Doing. Seeing. Touching. Debating. Presenting. Problem Solving. Experiencing. And to cool down? Reflecting.

Freely available online tools have been a key in helping me create the collaborative interactive learning space in my classroom. I have listed many here in my conference paper on this same topic that I am presenting next week at the International Symposium for Remote Sensing of the Environment (Berlin, May 2015).

Yes, this class has taken me a lot of effort and planning to set up. But now it's so much more fun and rewarding to teach! How many other university subjects start with Speed Dating? For my students, this is an integral ice breaker.

I challenge anyone reading this (if anyone ever does!) to have a go at HIIT in their academic teaching. I'd love to hear of your results. Please refer to my paper for more details, and also have a look at the poster below.
Picture
0 Comments

Inspiring the Next Generation of Environmental Scientists

30/4/2015

1 Comment

 
In 2013 I was fortunate enough to spend two months working from NASA Ames in Mountain View, California. Personally and professionally this one of the most memorable experiences of my life. There will never be enough time to give my glowing reports of my entire time there, but there was definitely one thing that really stood out to me. The NASA DEVELOP Program. 

This unique program links industry, government, and universities to conduct innovative research projects addressing problems of relevance to the community. It brings together students, early career professionals, and those in transitional stages of their career (e.g. finishing military service), forming teams to tackle environmental challenges using earth observation data. The stories of the next generation of environmental scientists participating in the program were incredibly inspiring.

I started to talk to NASA colleagues about how I could involve some of my students in Australia. They generously offered to engage with one of my current students, who was about to head over to Florida on a student exchange program. So I passed the opportunity on to one of my 2nd year Bachelor of Environmental Science undergraduate students. I was hoping that she could be a bit of a guinea pig for me, and give me an insider's perspective into the program. I want to share some of her thoughts to show just how inspirational the program is, and to highlight exactly why I want to create a similar experience in Australia.

"At the beginning of last year I signed up for a student exchange program. To my surprise I was actually accepted and I completed Semester 2 while studying abroad at the University of South Florida in Tampa, Florida. In total I spent about 4 and a half-months there– it was an amazing experience! 

Naturally I was really excited about this trip when I first got accepted and I talked a lot about it during Semester 1. This is how Karen came to know about my involvement with the student exchange program. Further to my surprise, as if the upcoming exchange trip wasn’t amazing enough, she provided me with another amazing opportunity. 

Now, you can imagine my shock when I opened and read her email one mediocre morning while casually on my way to work. NASA, what? Me? Has she sent this to the wrong person?

The opportunity Karen provided me with was to observe and take a small part in an internship program run across the US by NASA called NASA DEVELOP.  DEVELOP was formed with the hopes of bridging the gap between NASA and society, through involvement of the next generation and external organizations. 

The DEVELOP program is run right across the US in 13 different locations and 2 non-US locations. I got to visit the University of Georgia for a week in October to observe this internship in process during my semester abroad. 

When I visited UGA in the Fall term of the DEVELOP program, I spent time with the Colombia Ecological Forecasting team, where the objective was to enhance the conservation efforts of Colombia’s most endangered primate – the cotton-top tamarin. The team used NASA satellite data to aid in achieving the goals of the project partners, which was to increase the habitat suitability for the endangered primate. 

I just want to quickly point out that this South American country is actually located more than 2000 miles, or in other words about 3400kms away from Athens, Georgia. The fact that such thorough research can be done on an area so far away is pretty damn amazing. 

I just wanted to say that this experience was such an eye opener for me – its one thing learning about something in a school environment and then to actually get to see how it is put into practice in the real world. Like I’m sure many of you agree, I feel when you learn about things in university it has a detached feel to it – you know that what your learning is used by researchers and professionals, but its like you feel that what your learning isn’t the full thing. You know there must be more to it, and while it’s interesting, at the end of the day you just do what you need to do to pass and get that degree.

Being given the opportunity to travel to a NASA DEVELOP site and witness the work being done there has been one of the most inspirational experiences I have ever had. Seeing these students, just like ourselves having a key hand in something as precious as saving a entire species was just awe inspiring to me.

As a student who knew what I was interested in but no idea what kind of work to aim for, this experience has both reinforced why I’m studying Environmental Science and has given me something to aspire to upon completion of my degree." - Name withheld

The NASA DEVELOP Program fits squarely within my interests of linking research and education in remote sensing. It also promotes another keen interest of mine - leadership and effective teamwork. I would love to implement this in Australia. 
1 Comment

Cartooning and Communication

23/4/2015

1 Comment

 
As I've said before, I think that simplicity is the key to good communication. And it doesn't get much simpler than cartoons! So I thought that I might share some of the cartoon tools that I use to create percieved simplicity.

You may have seen ads on TV where you just can't take your eyes off a hand as it draws pictures or writes a message. They are often really simple, but somehow it just captures your attention and you keep watching to see what will be drawn next. 

When I first started seeing these ads appearing, all bearing similar characteristics, I realised that there had to be software creating them. Enter one of my favourite tools - Sparkol VideoScribe. I have created scribes for communicating a variety of different concepts (see my YouTube channel). I mostly use them for my students, but also for presentations I've given for our School, Funding Pitches, the VC, and... wait for it... for NASA! And if imitation is the sincerest form of flattery, several of my students and colleagues have tried their hand at creating their own scribes too. I'm by no means a guru at using this software, and you'll find far better scribes on youtube than mine! But I'm always learning, and having fun doing so. So I can definitely recommend having a play with this one.
Another online animating tool I've dabbled with is GoAnimate. I love using this to bring humour and satire into learning. Creating a short anime style cartoon forces me to really think about the key message, and return to Denzel Washington's "Explain it to me like I'm a six year old" (from Philadelphia). There are several more examples of my animated cartoons like the one below on my YouTube channel.
A recent find for me, and something that I look forward to using more is Pixton. So there's no motion or sound with Pixton, it's just old school cartooning. One of the best things about it is just how basic it is. I can demo how to use it in under five minutes, and then set the students on their own mission to communicate a concept. This one is so much fun to use, and you don't have to worry about having funky voices like in GoAnimate. Or worse - the horror of your own voice over in VideoScribe! I'm now building a repository of student created cartoons to be shared with future years. Below is an example from one of my students, Jenni Lo Choy, 2014.
Picture
Simple isn't the same as easy. These cartoons convey a message in a simple manner, but the underlying thought process is far more complex. It's certainly easier to present some text to cover the same points, but I argue that a mix of cartoons is more engaging and memorable.
1 Comment
<<Previous
Forward>>

    Karen Joyce

    I'm a remote sensing scientist with a keen interest in research and active learning

    Enter your email address:

    Delivered by FeedBurner

    Archives

    March 2022
    February 2022
    March 2020
    December 2018
    October 2018
    September 2018
    February 2017
    May 2016
    April 2016
    December 2015
    November 2015
    October 2015
    August 2015
    July 2015
    May 2015
    April 2015
    March 2015

    Categories

    All

    RSS Feed

Powered by Create your own unique website with customizable templates.